Cleaning your skillet:
YES– You can wash it with soap and use a gentle scrubber (the handmade round ones sold at craft fairs work great!) Why do folks say you shouldn’t wash it with soap? Because soap was originally made with lye which would strip the seasoning right off the pan.
DON’T– Put it in the dishwasher or let it sit overnight in dish water to soak off crud. If you really burned something onto the pan, put a little water into the pan and let it simmer for a few minutes on the stove. Let it cool a bit and then try scrubbing it. Repeat as needed. Remember, if the pan is still warm, make sure to use hot water so it doesn’t crack.
DO– Let your pan preheat on medium heat on the stove top before cooking eggs. The pan should be hot when you put your hand over it, butter should sizzle when added, and the eggs should immediately start to cook when you put them in. It takes practice with eggs so learn what heat setting you need and how many eggs your pan can hold to cook quickly without sticking. Never use high heat–eggs will stick. Patience and preheating is key. All you need is a hot pan and butter and they should scramble up within 60 sec.
WHY is my newly restored pan brownish instead of dark black like the ones in pictures??? The black is from the patina and constant heating that takes time to build up. The more you cook with it, especially in the oven, the quicker it will acquire that awesome black color. Cook hashbrown patties, cookies, Dutch baby pancakes, sliced potatoes…cooking foods that are greasy or need butter is a great way to build up a nice patina. Just be sure to use a cooking spray, oil, or butter to keep food from sticking.
WARNING– Acidic foods like tomatoes will strip the seasoning from your pan. I personally use enamel pans for recipes with lots of liquid or tomatoes. But there are plenty of folks who have no problem using their pans for these things. It’s likely because they have decades of seasoning built up on the pan.
Want to know how to de-crud or remove rust from your pan? Castironcollector.com is a great resource for this as well as so much more.
How To Reseason (or add extra layers to) Your Cast-Iron Cookware
After many years of testing and cooking with cast iron, Jeff Rogers, The Culinary Fanatic, has developed a tried-and-true method for seasoning cast iron for a very smooth, black patina on his cast iron. He explains his technique on his website…”Wiping the iron twice keeps it from pooling. Antique cast iron can be hard to season because it is so smooth. A lot of times when I would season at 450-500 degrees, I felt like the shortening was just burning off, and it was. It is so much easier to season a rougher modern Lodge skillet than a really slick Griswold skillet. So, I was looking for a method that worked well for both. I found that 400 degrees was the magic temperature for me. But, with just an hour at 400 degrees, the skillet was still a little tacky. So, I did some testing with two hours at 400. Voila!!! A beautifully seasoned skillet in which the oil adhered nicely and the skillet was not sticky at all.”
His seasoning method works well for vintage cast-iron cookware as well as modern pieces. Jeff uses Crisco vegetable shortening to season cast iron, which produces a durable finish. He recommends heating the cast iron to no more than 400°. You want to hit the smoke point of Crisco but not to burn it off. Everything online states that Crisco shortening smoke point is 490 degrees but I personally find anything over 400 starts smoking, even with the pan wiped thoroughly. If you use a different fat, with a higher smoke point, you should adjust the oven temperature accordingly. I also only “bake” my pans for an hour and have never had them tacky. You can search online for how to season your pan and you’ll find hundreds of different ways. Find what works for you to get the initial buildup and then just use your pan a lot.
THE JEFF ROGERS CAST-IRON RESEASONING METHOD
What you’ll need:
☛ Crisco vegetable shortening
☛ A lint-free cotton rag
☛ Scott Shop Towels
1. Heat your oven to 200°.
2. Put the skillet in the oven upside down for 20 minutes.
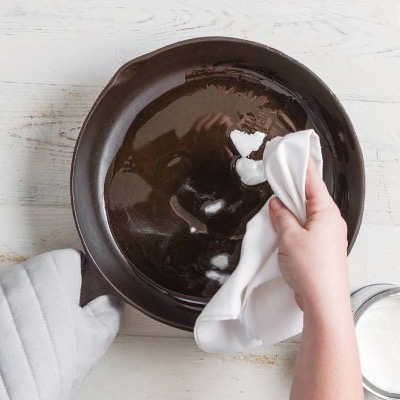
3. Apply a liberal amount of Crisco shortening with a lint-free, cotton rag. (Because the skillet will be warm, the Crisco will melt quickly.)
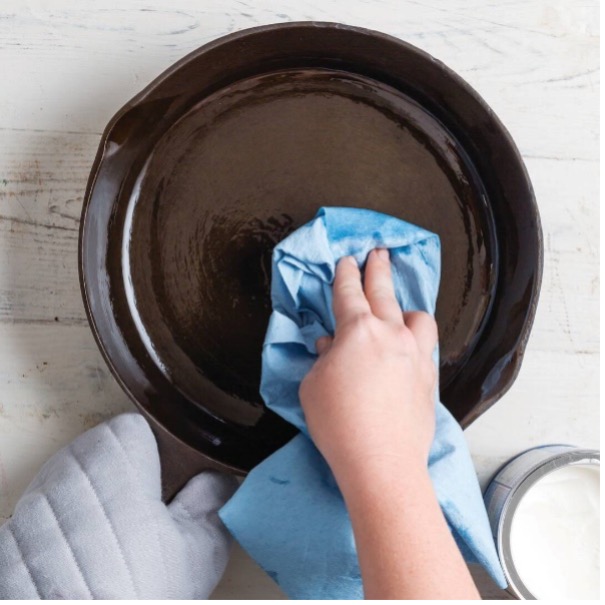
4. Wipe off all Crisco with an absorbent paper towel. Jeff uses blue Scott Shop Towels.
5. Put the skillet back in the oven upside down, increase temperature to 300°, and set a timer for 15 minutes.
6. After 15 minutes, remove the skillet and wipe again with a new towel, lightly. It will appear like you have removed all the oil but in fact, it has settled into the pan. If you haven’t wiped it entirely clear, blotches will appear after it heats.
7. Place the skillet back in the oven, increase oven temperature to 400°, and let it go for 2 hours.
8. Let the skillet cool completely in the oven.
9. Repeat the process if you want your skillet to have more sheen. Do not repeat more than 3 to 4 times.